Tuesday, November 16, 2010

MAC "Coral Crepe" paintpot


flash
no flash

Eyes:
- MAC Coral crepe paint pot on lid
- MAC "Swiss chocolate" on crease & outter 2/3 of lower lash line
- MAC "Charcoal brown" on outter V
- MAC "Rule" as transition color
- some matte white shadow on browbone & inner corners
- MAC "Dip down" fluidline on upper lash line & lower lash line

Cheeks:
- Anna Sui blush #600
- MAC "Pinch O' Peach" blush on apples of cheeks
- MAC MSF "By Candlelight" on cheekbones
Lips:
Kanebo PK-3

Saturday, November 13, 2010


Top left to right: Sheseido Hydro-powder e/s "Whitelights", Red Earth PU078 (shattered)
Bttom L to R: Sephora e/s "aspen summit" (I think that's the name?); MAC "Scene"; MAC "Beauty marked"; MAC "Rule


no lipstick here, but eyes show more of the colour than the first pic
Eyes:
- Red Earth PU078 on lid, not passing the crease & lower lash line
- Sephora e/s "aspen summit" on inner 1/3 of lid & brow bone
- Sheseido Hydro-powder e/s "Whitelights" on top of sehpora e/s & inner corners
-MAC "Scene" on crease
-MAC "Rule" as transition colour
- MAC "Beauty marked" on outter V
- MAC black track fluidline to line upper lash line & lower lash line
Cheeks:
- MAC "Melba" blush
- MAC bronzing powder in "golden"
- MAC MSF "By Candlelight" as highlight
Lips:
- MAC "Shy girl" lipstick


Tuesday, November 9, 2010

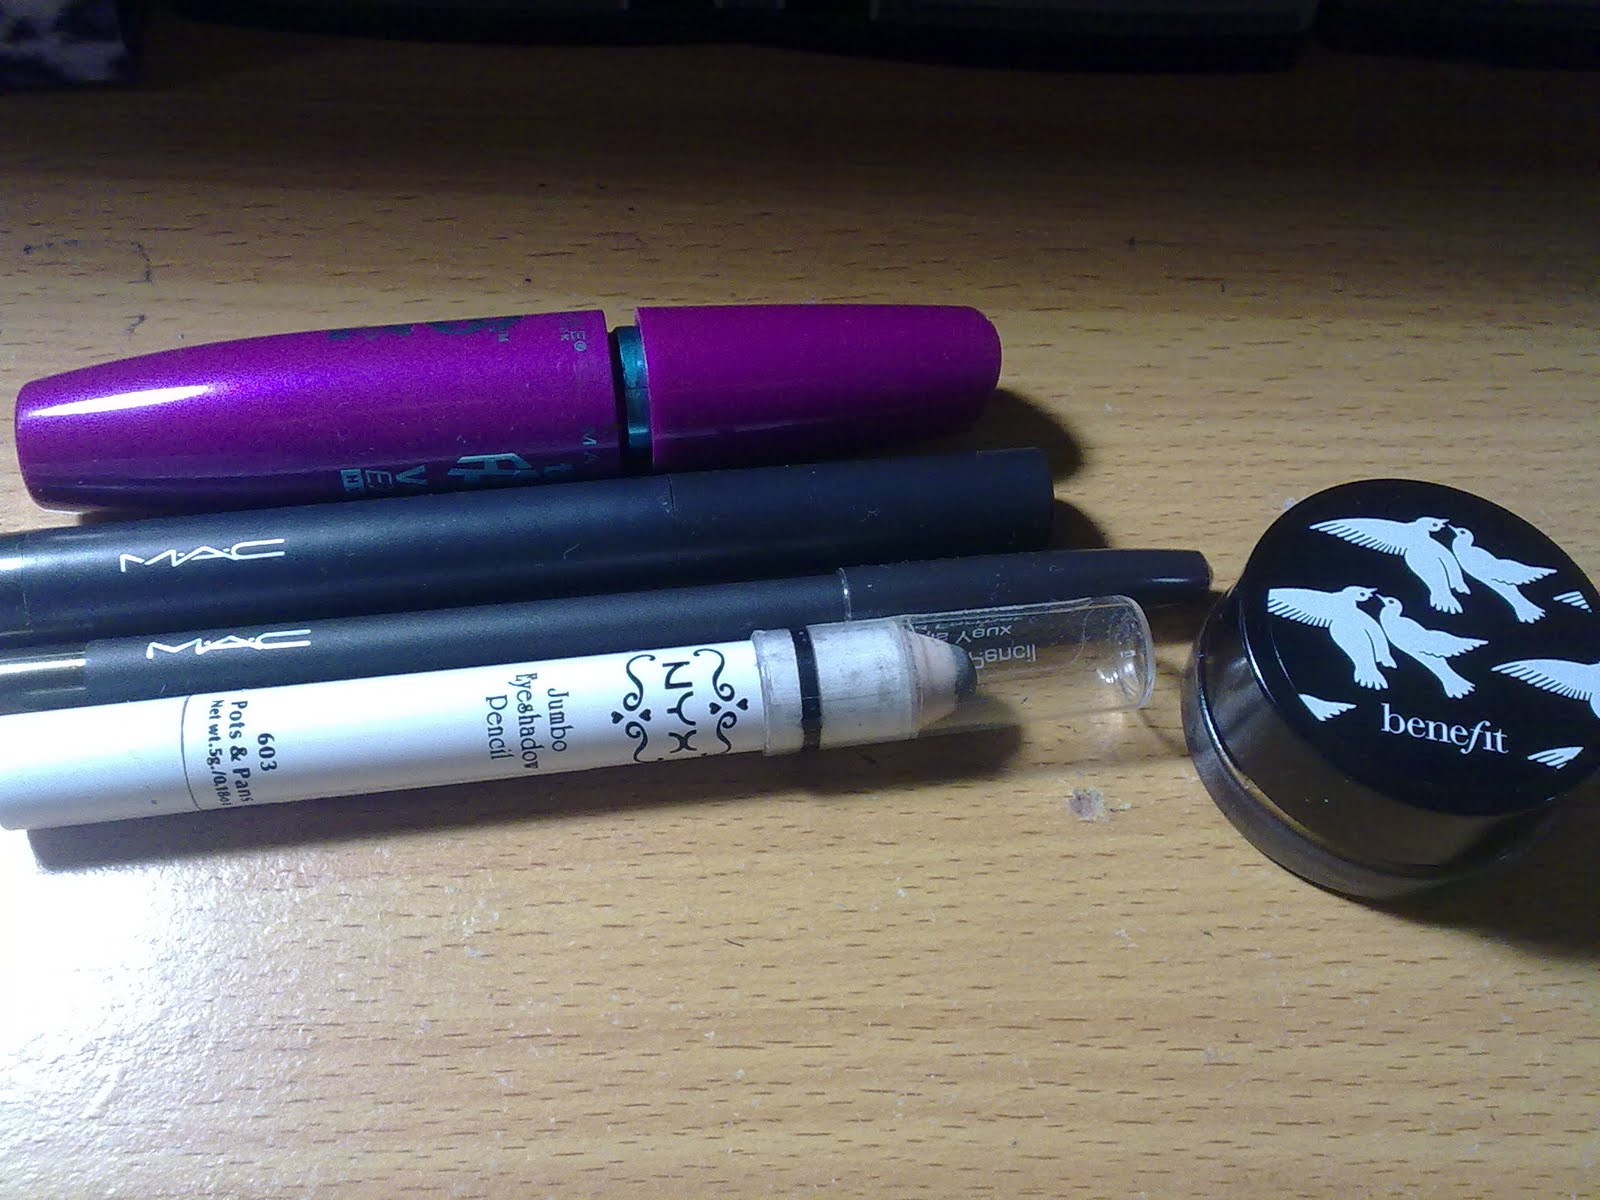
Benefit "Skinny Jeans" creaseless cream shadow [on the go smokey eyes]


Benefit creaseless cream eyesahdow/liner "Skinny jeans"
Maybelline Falsies mascara
MAC Shadestick in "Sharkskin" [black with silver glitters]
MAC pearlglide eyeliner in "black line" [black with gold glitters]
NYX jumbo pencil "Pots & Pans" [silver]


Cheeks: MAC bronzing powder in "Golden"; MAC MSF "By candlelight"
Lips: MAC Creme de Nude lipstick


1) Apply Skinny Jeans all over the lid, not too high up, blend it out with your fingers to make sure there are no sharp edges (also put some along the lower lash line)
2) Put some black eye shadow or black paint stick(ex: NYX jumbo pencil "Black Bean") on the outter V to add depth to eyes. Blend it out.
3) Apply black eyeliner along upper lash line & lower lash line (I'm lovingg the MAC "Blackline" Pearlglide eyeliner, it does NOT smudge & it has gold glitter in it :D )

4) Apply mascara on top & lower lashes

5) Apply white eyshadow/silver eyeliner on inner corners
[ if you have time, highlight your brow bone and add some brown eyesahdow on the mid section of your eyes]


Finished


Monday, November 8, 2010

OPI Expert Touch Lacquer remover vs Sally Hansen


[I put the Sally Hansen nail polish into the container on the left b/c its so much more convienient]

As you can see, I have cracks on my nails (all the time) because I wear nail polish everyday. Right now, my nails are all at around the same length. However, before I started using the OPI nail polish remover, once my nails chipped, they'd get even more fragile after I use the Sally Hansen nail polish remover to take off my nail polish. Eventually I'd have to cut them short.
Price:
Sally Hansen nail polish remover only costs a few bucks but the OPI is $20. However, I got it for $10 when it was on sale at London Drugs.
Improvements from switching to OPI:
- nails aren't as yellow
- stronger nails after using it to remove nail polish (usually they'd be soft and fragile)
- moisturizing (like ACTUALLY)
- What I LOVE about this is that it STOPS my nails from chipping FURTHER. Before, when I triped digging under the chipped part it'd peal even more, but with the OPI, even when i try to dig underneath, I CAN'T! [I know i'm not supposed to dig it in the first place though hahah]
I'm going to stick with the OPI nail polish remover and I'm just going to use Sally when I use my Konad kit :)
  • So earlier I ordered the Nail Tek Foundation II online because it was highly recommended by this make-up guru on youtube, she said that it was what prevented her nails from getting chipped. I paid $10 CAD in total but I think it's only about $5 in the states or something. ANyway I was really excited about it but after using it twice, I realised that it made my nail polish chip really fast and just worsened my nail condition. I'll use it a couple more times before I'm sure of anything but so far I'm not happy with it.


Saturday, October 23, 2010

FOTD featuring MAC "She Who Dares" (Green side)


Eyes:
  • MAC "All that Glitters" on firt 1/2 of lid (pass the double lid line) & mid section of lower lash line
  • MAC "Humid" on the outter 2/3 of lid up to the crease
  • MAC "Rule" as blending colour
  • MAC "She Who Dares" Green side (Foil it) on top of Humid & outter 1/3 of lower lash line Any black eyeshadow on outter V
  • Any matte white shadow (Lancome "Latte") as brow bone highlight
  • NYX jumbo pencil "pots and pans" on inner corners & shimmery white shadow on top

Cheeks:

  • Anna Sui blush #600
  • MAC "Melba" slightly on top
  • MAC MSF "By Candlelight" for highlight
  • Benefit Hoola for contour

Lips:

  • MAC "Dressmakerdressmaker"
  • Anna Sui lipgloss #604

Thursday, October 21, 2010

Nails: Pink tip w/ sparkles


Covergirl Disco Dazzle #405 & OPI "Heart Throb" (sheer pink)[you need a sheer nail polish for this look because you want to apply more layers as you move towards the tip of your nails]